Nail care is not just a matter of aesthetics; it’s a form of self-care that empowers you to put your best foot (or hand) forward. Whether you’re a nail enthusiast or a novice looking to explore the world of DIY beauty, this guide will equip you with the knowledge and skills needed to master the art of at-home manicures and pedicures. From selecting the perfect polish to tending to your cuticles with precision, we’ve got you covered. Get ready to indulge in some well-deserved pampering and discover the joy of transforming your nails into dazzling works of art. Your journey to party-ready nails starts here!
The Perfect DIY Manicure
Step-by-step guide to applying nail polish:
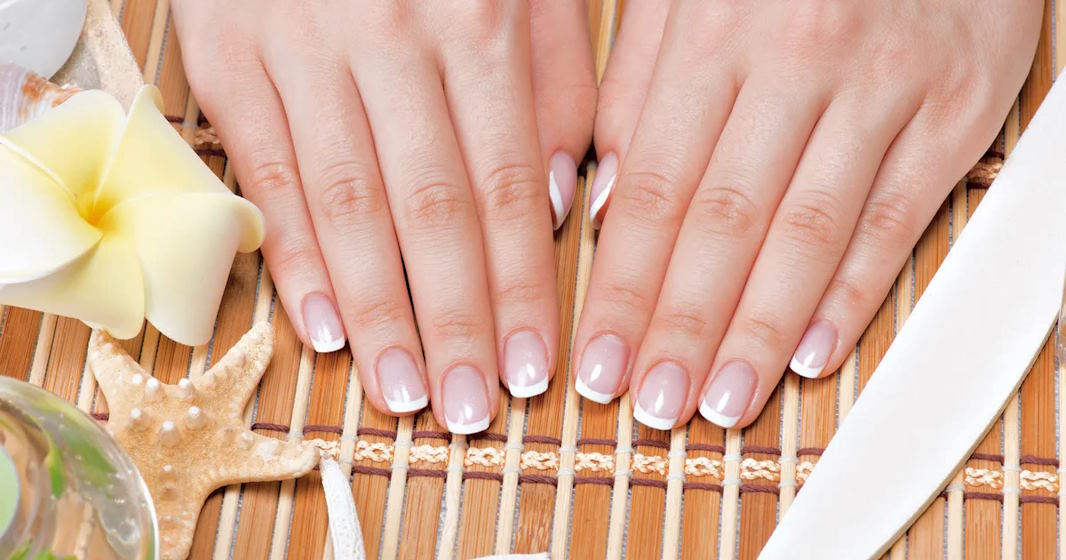
Achieving a salon-quality manicure at home is simpler than you might think. Start by selecting your favorite nail polish color and gather all your tools. Begin with clean, well-prepped nails – remember, clean nails are key to a lasting finish. Apply a base coat to protect your natural nails and enhance polish adherence. Allow it to dry for a minute or two.
Now, it’s time for the fun part. Dip your brush into the polish, wiping off excess on the inside of the bottle neck. Begin with a vertical stripe down the center of your nail, followed by one on each side. This even distribution of color minimizes streaks and provides a smooth, even finish. Let the first coat dry completely before applying a second one if needed.
Tips for achieving a streak-free finish:
Streaks are the bane of any nail enthusiast’s existence, but they’re avoidable with a few tricks. Always work in thin, even layers, and ensure each coat dries completely before applying the next. Applying polish in thin layers minimizes the risk of streaks and allows for quicker drying.
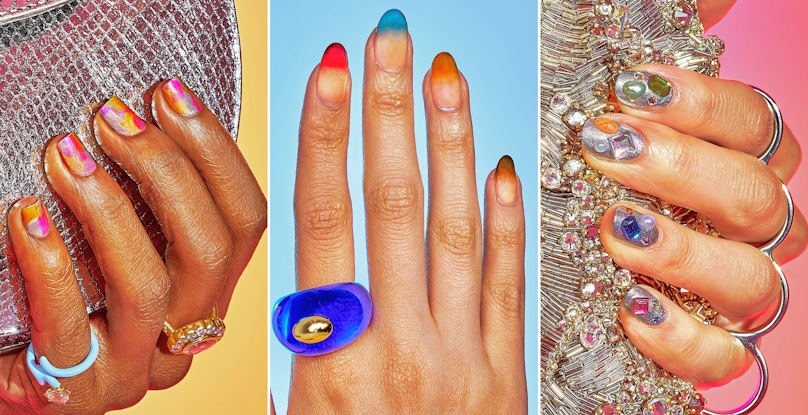
Nail art ideas and techniques for creative designs:
Nail art is all about unleashing your creativity. After your base color is dry, use nail art brushes, dotting tools, or even toothpicks to create intricate designs. From simple French tips to elaborate floral patterns, the possibilities are endless.
Pedicure Perfection
How to prepare your feet for a pedicure:
Before you dive into the world of DIY pedicures, it’s essential to prepare your feet properly. Start by soaking your feet in warm, soapy water for about 10-15 minutes. This softens the skin and makes it easier to remove dead skin cells later. Use a pumice stone or a foot file to gently exfoliate rough patches, especially around the heels and balls of your feet. Once you’re done, dry your feet thoroughly.
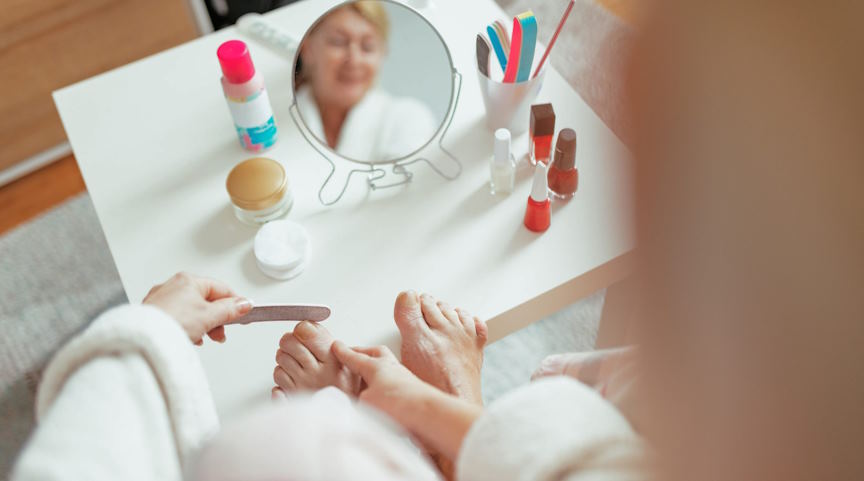
Steps for painting toenails neatly:
Achieving a neat toenail paint job is all about precision. Begin with a base coat to protect your nails. When applying nail polish, steady your hand and paint in thin, even strokes. Start with a stripe down the middle, followed by two on each side. If you make any mistakes, a small brush dipped in nail polish remover can help clean up the edges. Allow the first coat to dry before applying a second if needed.
Addressing common foot issues (corns, calluses, etc.):
Don’t ignore common foot issues during your pedicure. Gently file away calluses and use a cuticle pusher to address any overgrown cuticles. If you have corns or ingrown toenails, consult a professional or use specialized tools designed for these concerns.
Maintaining Your Manicure and Pedicure
Strategies to prolong the life of your nail polish:
Maintaining your manicure and pedicure starts with prevention. To extend the life of your nail polish, wear gloves when doing household chores, as harsh chemicals and detergents can weaken your polish. Avoid using your nails as tools; instead, use the pads of your fingers. Also, be mindful of activities that may cause excessive wear and tear on your nails.
Tips for touch-ups between full manicures and pedicures:
Sometimes, you might not have the time for a full redo but need a quick fix. Keep your base color and topcoat on hand for touch-ups. Clean the chipped area with nail polish remover, apply a thin layer of base coat, add a touch of polish, and finish with topcoat. This will help disguise small imperfections and keep your nails looking fresh.
Dealing with chipped nails and polish emergencies:
Chipped nails happen to the best of us, but they don’t have to ruin your day. If a nail chips, gently file down the rough edge to prevent further damage. You can also use a nail repair kit to fix minor chips. If you’re facing a polish emergency, apply a glittery or textured polish to the chipped nail for a stylish and quick cover-up.